
Project Costs
The Costs tab on a project answers one question: is this job making money. It totals what you have billed, what the job has cost, and what is left, then lists every cost that makes up the total. Costs arrive two ways. DrillerDB captures them from approved timecards, inventory usage, and equipment logs, and you add the rest by hand.
Open a project and click the Costs tab. On a narrow window the tab sits under More at the end of the tab row.
The Costs tab needs cost codes and rates before it can total anything. Set those up first. See Job Costing Setup.
Quick Start
- Open the project and click the Costs tab.
- Read the totals strip for Total Costs, Gross Profit, and Margin.
- Click Add Cost to enter a cost by hand.
- Click Run Capture to pull in labor, material, and equipment costs for a date range.
- Use the pencil icon on any row to correct an entry, and the trash icon to remove one.
Step-by-Step: Read the Costs tab
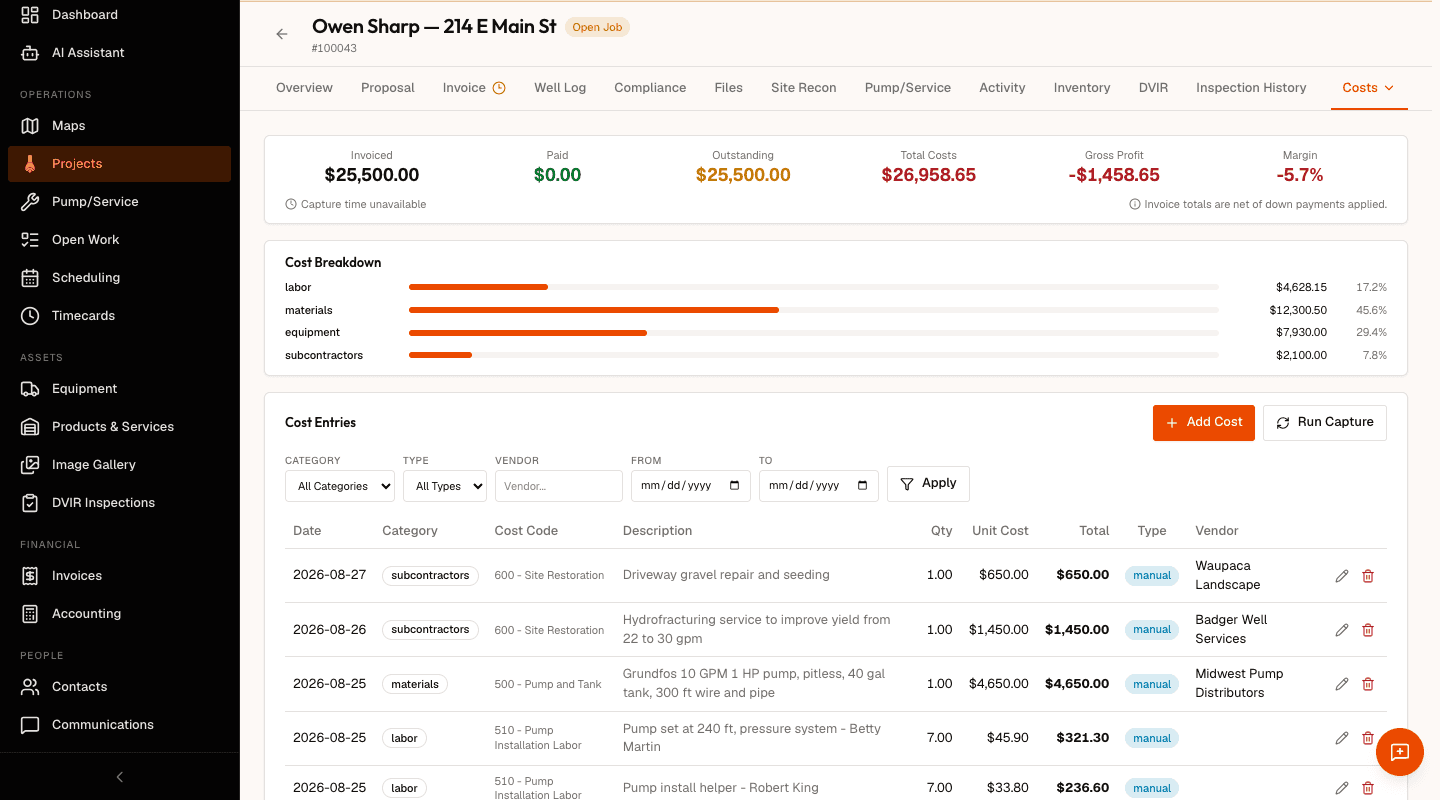
The strip across the top carries six numbers.
| Number | What it is |
|---|---|
| Invoiced | What you have billed on this project, net of any down payments applied. |
| Paid | What the customer has paid. |
| Outstanding | Invoiced less Paid. |
| Total Costs | Every cost entry on the job added up. |
| Gross Profit | Invoiced less Total Costs. It shows red when the job is underwater. |
| Margin | Gross Profit as a percentage of Invoiced. |
Cost Breakdown splits the total by category, so you can see at a glance whether the job went over on labor or on materials.
Cost Entries below it lists the individual costs. The Date column shows the day the cost belongs to. Type reads auto for a captured cost and manual for one somebody entered.
Narrow the list with the filters above the table. Choose a Category, choose a Type of Auto or Manual, type a Vendor, set a From and To date, then click Apply.
Step-by-Step: Add a cost by hand
Use this for anything DrillerDB cannot capture, such as a subcontractor invoice or a materials run somebody paid for out of pocket.
- Click Add Cost. The Add Cost Entry dialog opens.
- Pick a Cost Code. This one is required, and it decides which category the cost lands in.
- Set the Date. This is the day the cost belongs to, not the day you type it in, and it drives the date filters and every report that reads this project.
- Leave Service Job on None (project only) unless the cost belongs to a specific pump or service job on this project.
- Enter the Quantity and Unit Cost ($). For a flat charge with no hours or units behind it, tick Lump sum amount and enter the amount once.
- Add a Vendor Name and a Description. Write the description so it still makes sense to somebody reading the job a year from now.
- Click Save.
Step-by-Step: Correct or remove a cost
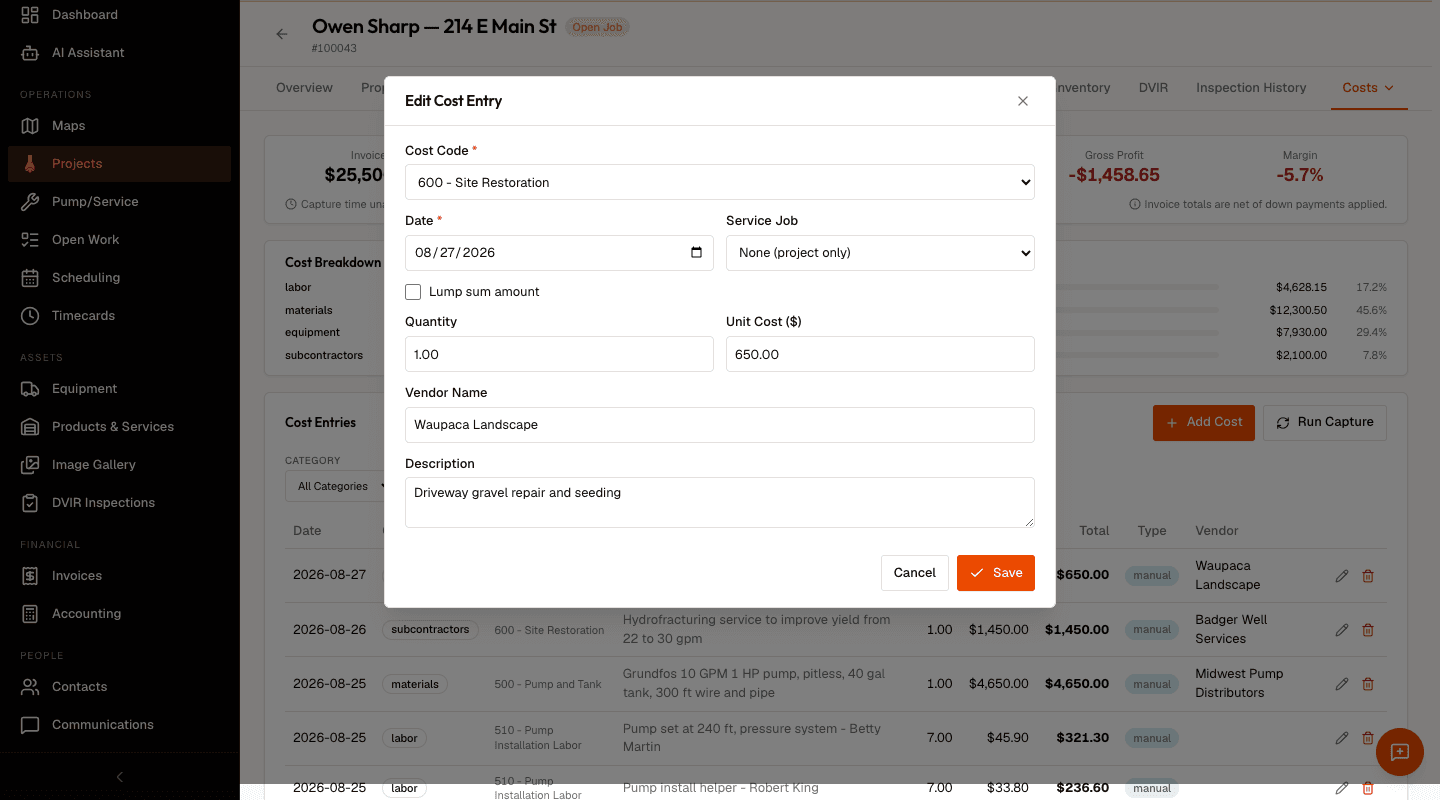
- Find the row and click the pencil icon at the right.
- The Edit Cost Entry dialog opens with the entry's values already filled in, including its date.
- Change what you need and click Save.
To remove an entry, click the trash icon on its row. Deleting changes Total Costs, and with it the profit and margin on the job, so check the row before you delete it.
Step-by-Step: Pull in captured costs
Run Capture sweeps a date range and brings in the costs DrillerDB can work out for itself.
- Click Run Capture. The Run Cost Capture dialog opens with a date range covering the last 30 days.
- Adjust From and To. The From date has to come before the To date.
- Leave labor, materials, and equipment ticked, or untick the ones you do not want on this pass.
- Run it. Captured entries appear in the list with a Type of
auto.
Capture reads approved timecards, inventory usage, and equipment logs, so a timecard nobody has approved yet does not appear. Which of the three sources are live is set under Settings > Job Costing.
Related Topics
- Job Costing Setup - cost codes, employee and equipment rates, and the auto-capture rules.
- Job Costing - the same numbers across every project, with WIP and retainage.
- Project Details - the rest of the project record and its other tabs.
- Track Time - approving the timecards that captured labor comes from.