This guide is based on a browser-recorded walkthrough in the rebuilt DrillerDB console. When a step can send, submit, export, or change account access, the guide calls out the review boundary.
The Site Planner builds an interactive 3D model of the property, with real terrain, aerial imagery, parcel lines, buildings, and nearby state well logs, so you can stake the well, lay out the rig and hazards, and check depth before the rig rolls. There is no separate planner section in the sidebar: open it from the job. One site is shared per property, so a pump job and a drilling project at the same address see the same plan. Estimates interpolate real logs in view and always show confidence and distance to the nearest log; when there is no nearby data the planner says so instead of inventing numbers.
Quick Start
- Open the planner from the job
- Stake the well and map the site
- Read the estimate, and its confidence
- Cut the section and set the drilling plan
- Fit the rig
- Export the plan
Step-by-Step: Plan a Site in 3D
Open the planner from the job
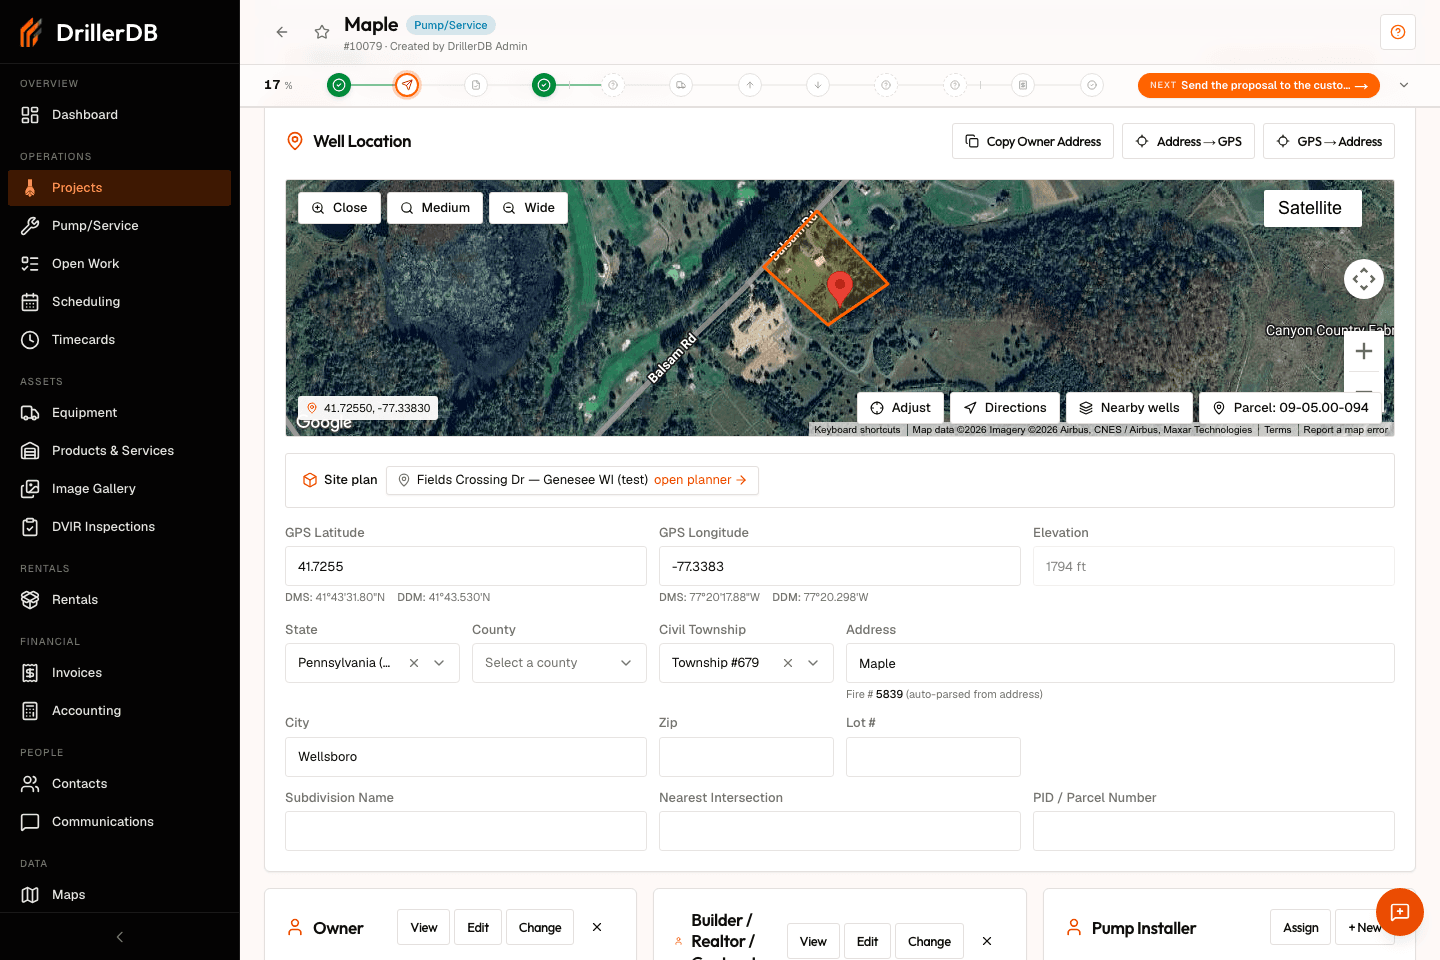
On a project's Main tab, or a Pump/Service job's Details tab, find the site plan card under the location section. Click "Plan site in 3D" to create the site from the job's GPS or address, or open the linked site chip if a plan already exists. Jobs at the same property share one plan automatically.
The button is disabled until the job has GPS coordinates or an address. Add either on the project first.
Stake the well and map the site
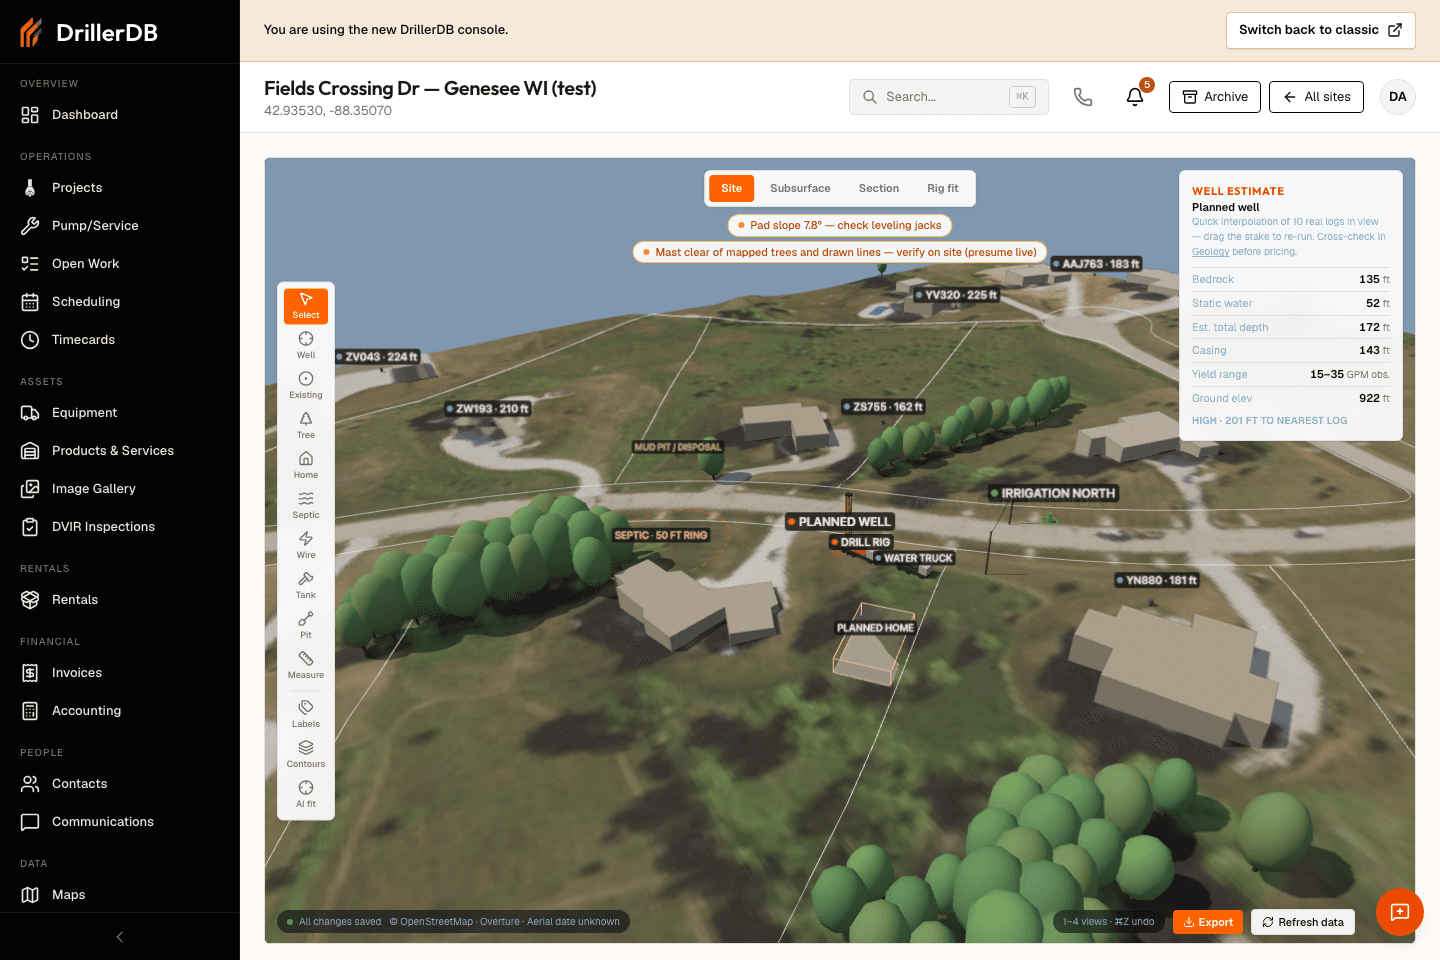
Use the tool rail to stake planned wells, mark existing wells, and place trees, buildings, septic systems with their isolation rings, overhead power lines, tanks, and mud pits. Drag anything to move it; the planner warns live about septic setbacks, well spacing, and mast clearance. Press ⌘Z to undo, and use the Measure tool to tape distances.
Every staked object gets GPS coordinates you can copy from its panel for staking in the field.
Read the estimate, and its confidence
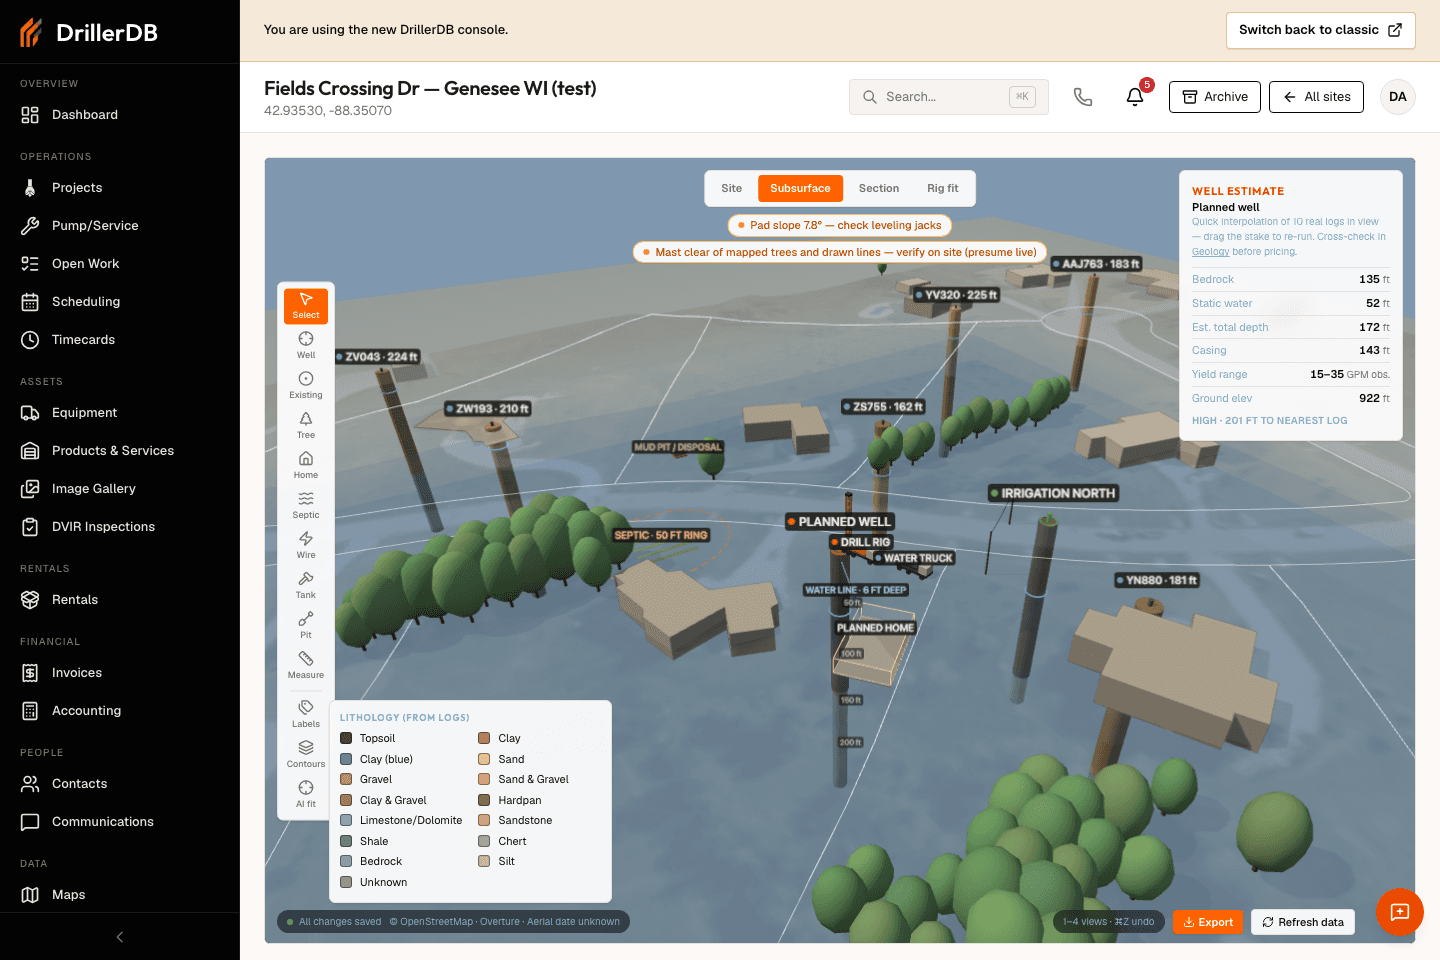
The Well Estimate card interpolates bedrock, static water, total depth, casing, and observed yield from the real state well logs in view. It always shows a confidence level and the distance to the nearest log; switch to Subsurface view to see those logs as 3D lithology columns underground. When no logs are nearby, the card says so; nothing is invented.
Cross-check the estimate in Geology before pricing, since the card links straight to it.
Cut the section and set the drilling plan
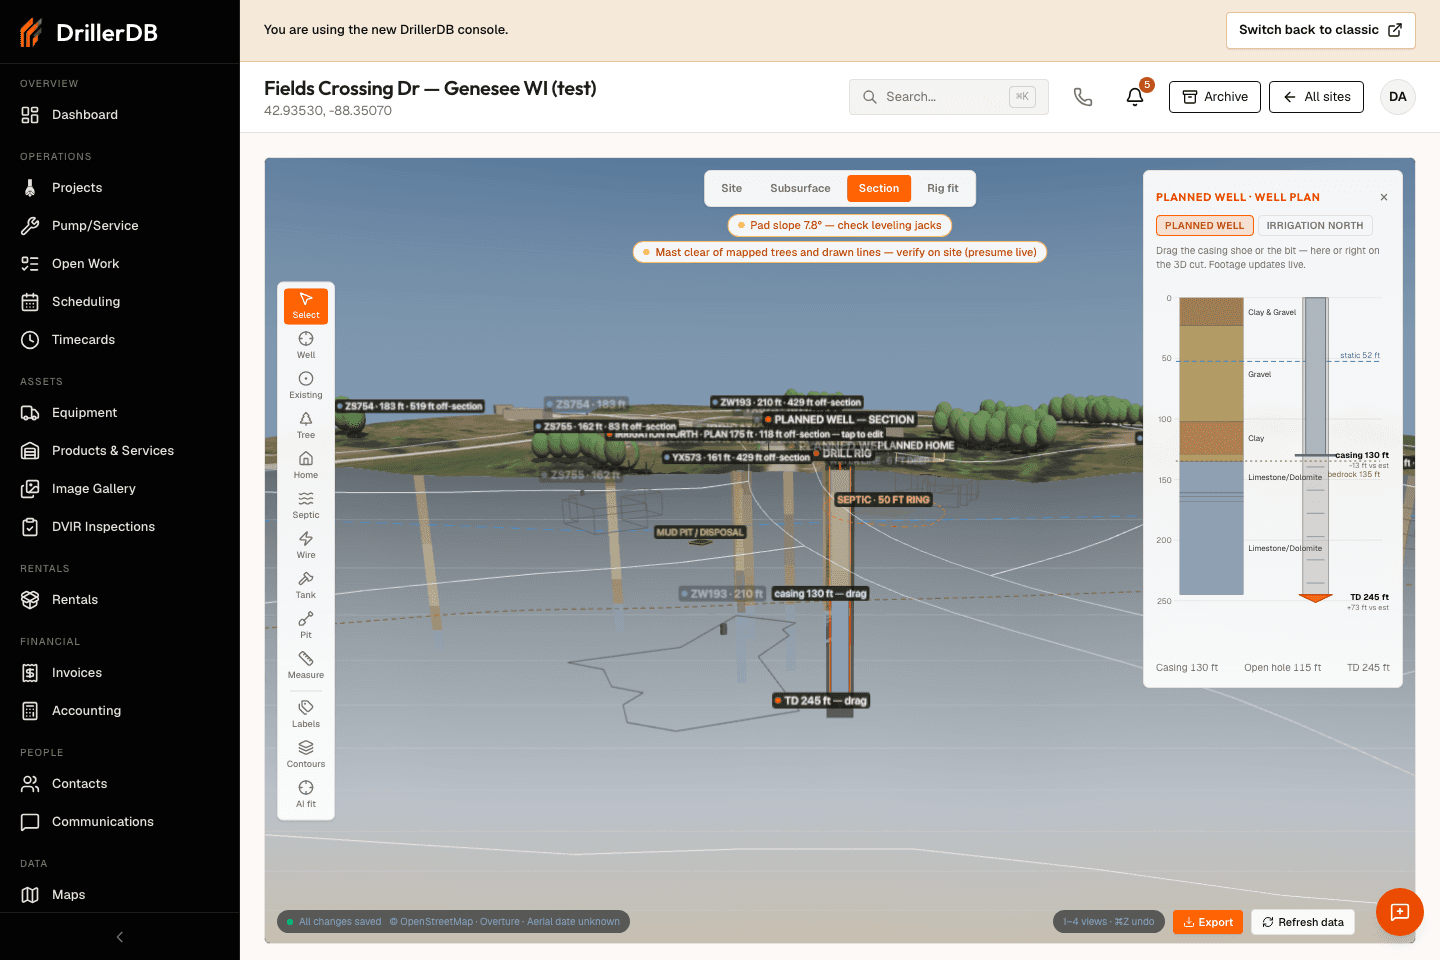
Section view slices the earth at your planned well. Drag the casing shoe and the bit, on the 3D cut or the side diagram, to set planned casing and total depth; footage updates live against the estimate. With multiple planned wells, tap another well's bar to re-cut the section there.
Fit the rig
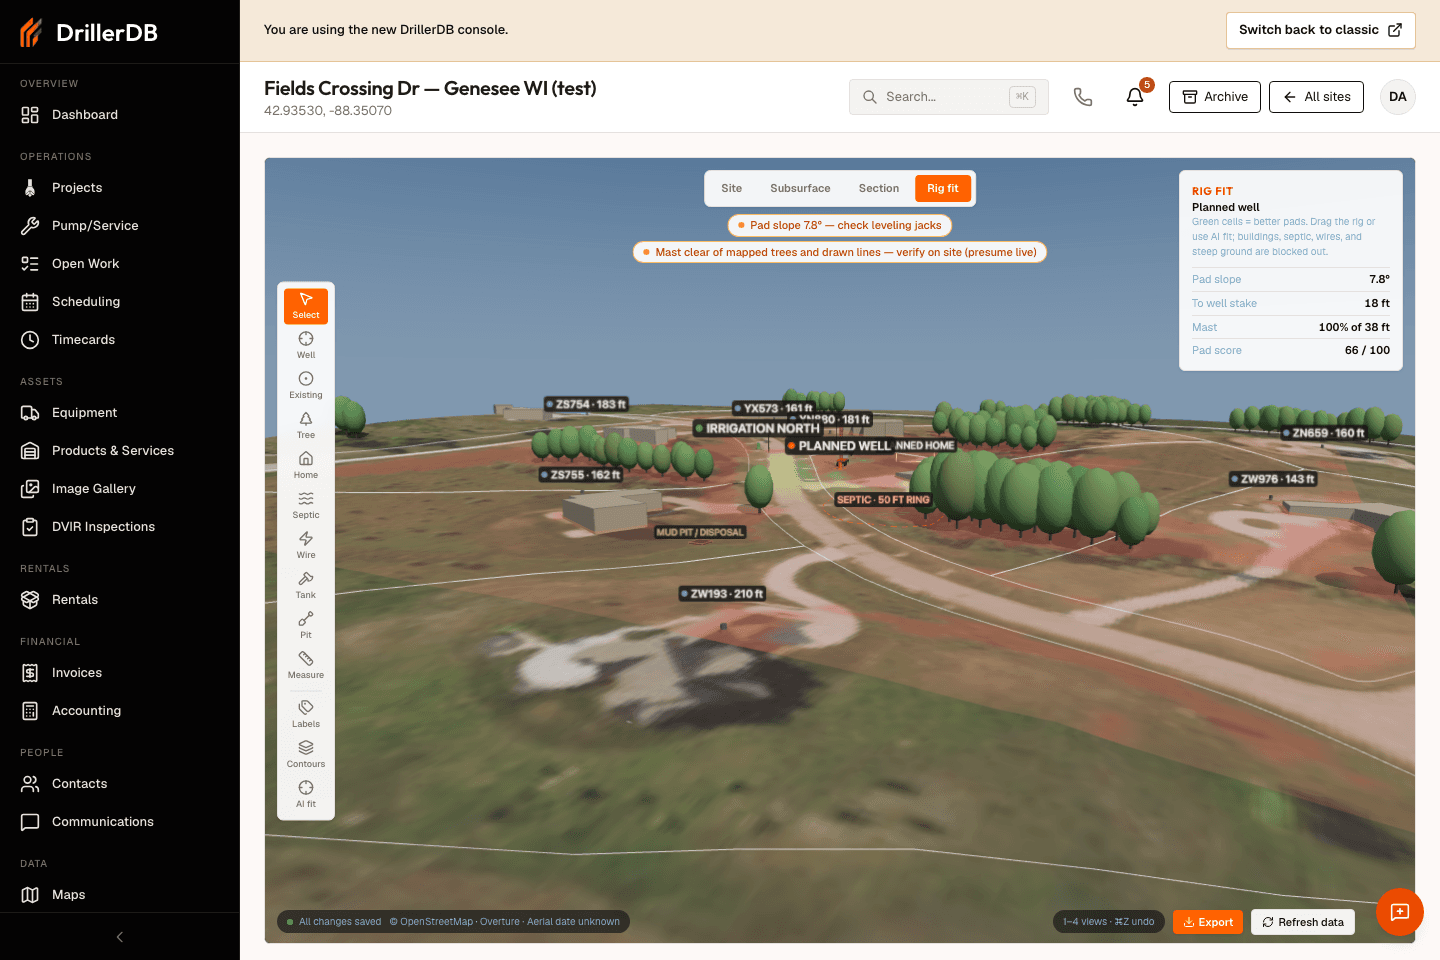
Rig fit view scores the ground around your stake: green cells are better pads. Buildings, septic rings, drawn power lines, and steep slopes are blocked out. Drag the rig yourself or use AI fit to place it, then check the pad slope, distance to the stake, and mast clearance readout.
Set your rig's real mast height on the rig panel, so tree and power-line clearance checks follow it.
Export the plan
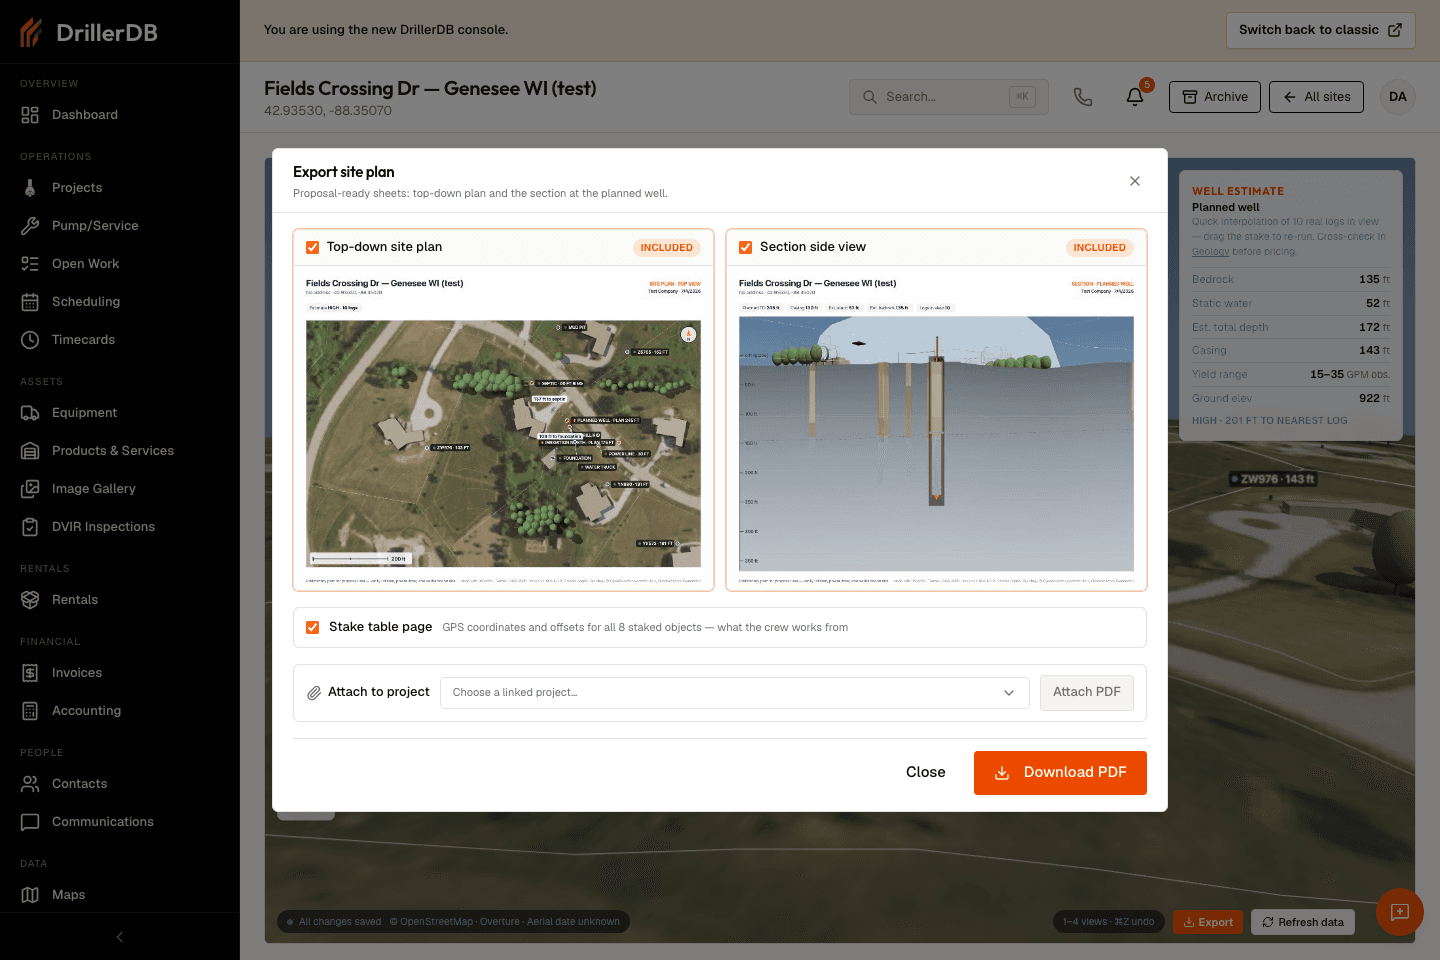
Export produces a proposal-ready PDF: a north-up top-down site plan, the section side view with the drilling plan, and a stake table with GPS coordinates, offsets, and bearings for every staked object. Download it or attach it straight to a linked project's Files tab.
The sheets carry your company name and logo, ready for the customer or the permit packet.