
Well Log (Well Completion Report)
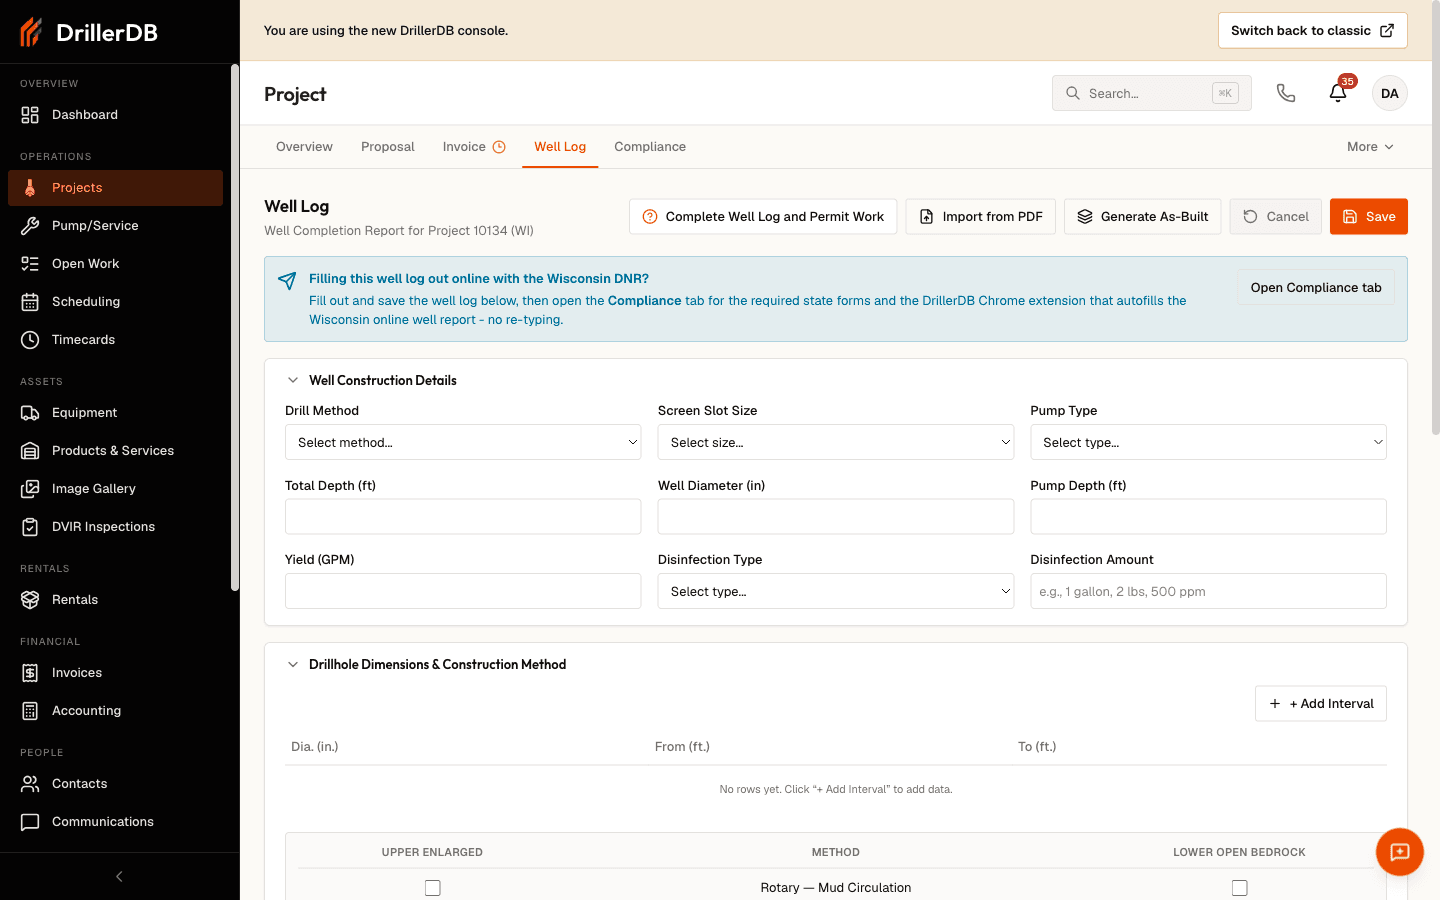
The Well Log tab is where you record your Well Completion Report (WCR) -- the official record of how a well was constructed. DrillerDB breaks the WCR into clear sections that match state reporting requirements. You can fill it out by hand, import data from a PDF, or generate a state-specific form for download.
Quick Start
- Open a project from Projects
- Select the Well Log tab
- Fill out construction, casing, grout, geology, water level, pumping test, and well status details
- Use Import from PDF if you have an existing report to extract
- Use Generate As-Built or the state well-log download button when the report is ready
Step-by-Step: Complete a Well Log
Work through the Well Log tab from top to bottom, then review imported or generated output before using it for compliance or billing.
Opening the Well Log
- Open any project from the Projects list
- Click the Well Log tab in the tab bar
The tab shows a green checkmark when the well log has been completed.
The Well Log tab appears on every project. You do not need to enable it separately.
Sections of the Well Log
The well log form is divided into these sections. Scroll down through the form to fill out each one.
Potential Contamination Sources
Records whether the well is in a flood plain and the distance (in feet) from the well to nearby contamination sources like septic tanks, petroleum storage, animal barns, and landfills.
- Select Yes or No for the flood plain question
- Click Show/Hide Contamination Sources to expand the full list
- Enter distances in feet for each applicable source
Drillhole Dimensions and Construction Method
Records the borehole diameter and depth intervals, plus the drilling method used.
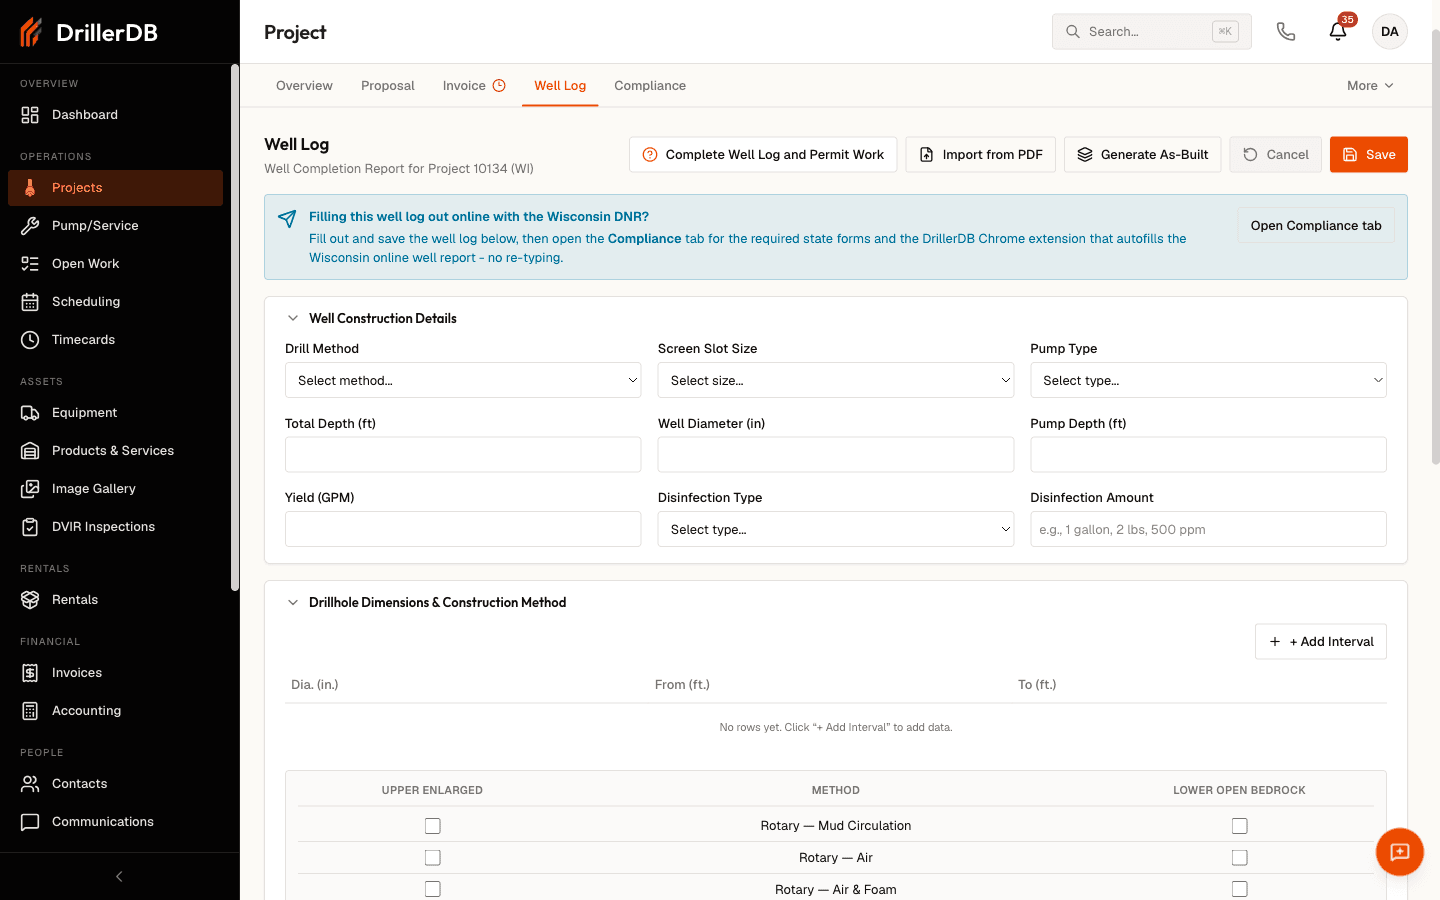
- Enter the Diameter (in.), From (ft.), and To (ft.) for each drill hole section
- Click + Add Interval if the hole changes diameter at different depths
- Check the boxes for the construction methods used -- mark whether each method was used for the Upper Enlarged Drillhole (left column) or Lower Open Bedrock (right column)
Available methods include:
- Rotary - Mud Circulation
- Rotary - Air
- Rotary - Air & Foam
- Drill-Through Casing Hammer
- Reverse Rotary
- Cable-tool Bit (enter bit size in inches)
- Dual Rotary
- Temp. Outer Casing (enter diameter)
Well Construction Details
Additional construction information including:
- Pump Depth (in feet)
- Disinfection Amount
- Other well-specific construction data
Casing, Liner, Screen
Records the casing, liner, and screen specifications installed in the well.
- For each casing/liner/screen section, enter:
- Diameter (in.) -- the pipe or screen diameter
- Material/Description -- type of casing (e.g., "Std Blk Pipe 18.97 New Steel Plain End Welded Joint")
- From (ft.) -- starting depth
- To (ft.) -- ending depth
- Click + Add Casing to add additional casing sections
Most wells have at least one casing entry. Multi-stage wells may have several rows with different diameters and materials at different depths.
Grout / Sealing Material
Records the grout and sealing materials used to seal the annular space between the casing and the borehole.
- Enter the Method used for grouting (e.g., tremie pipe, pressure)
- For each sealing layer, enter:
- Kind of Sealing Material -- e.g., "Drill Cuttings", "Neat Cement"
- From (ft.) and To (ft.) -- the depth interval
- # Sacks Cement -- number of sacks used (if applicable)
- Click + Add Grout for additional sealing layers. In Colorado the section is called Annular Materials and the button reads + Add Annular Interval.
Geology
Records the geological formations encountered during drilling, from surface to total depth.
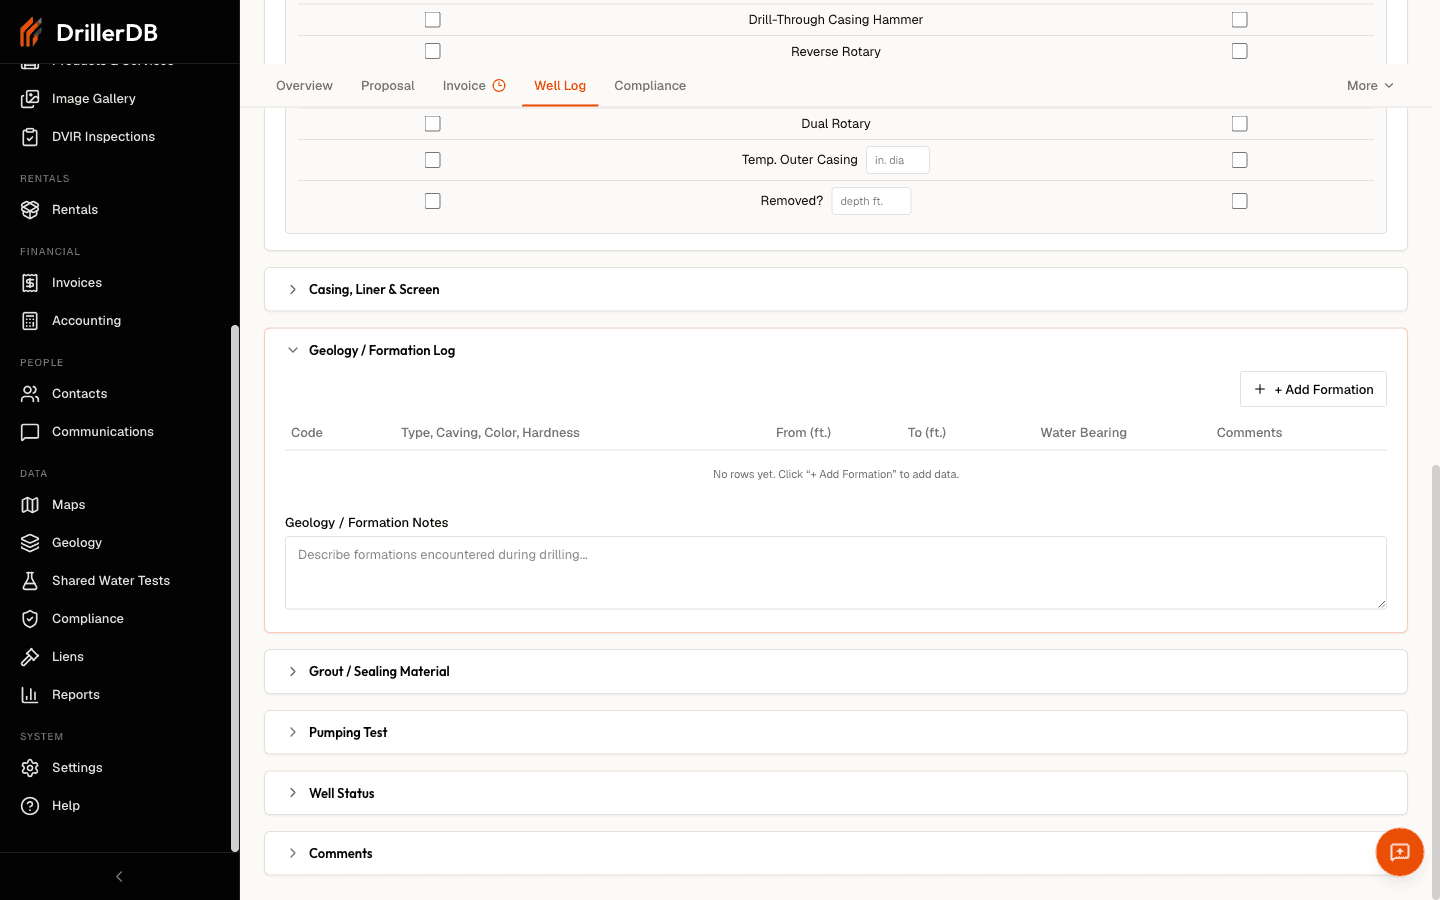
- For each formation layer, enter:
- Code -- formation name (e.g., "Clay", "Sand & Gravel", "Lime Rock")
- Type, Caving, Color, Hardness -- detailed description of the formation
- From (ft.) and To (ft.) -- depth interval
- Click + Add Formation for each new formation layer
Enter geology layers from shallowest to deepest. The "From" depth of each layer should match the "To" depth of the layer above it.
Static Water Level
Records the depth at which water naturally rests in the well when no pumping is occurring.
- Enter the water level depth in feet
- Select whether the measurement is Above or Below ground surface
Pumping Test
Records the results of the well's pumping test, which determines the well's yield.
- Enter the Pump Rate (gallons per minute)
- Enter the Drawdown (feet) -- how far the water level dropped during pumping
- Enter the Test Duration (hours)
- Select the pumping method: Airlift, Test Pump, or Other
Well Status
Records the final condition of the well after construction.
- Enter the Well Height in inches
- Select whether the casing is Above Grade or Below Grade
- Check the applicable boxes:
- Developed -- Was the well developed (cleaned out)?
- Disinfected -- Was the well disinfected?
- Capped -- Is the well properly capped?
- Enter any Field Comments or Office Comments at the bottom of the form
Importing from PDF
Instead of typing everything manually, you can import well log data from a PDF file.
- Click the Import from PDF button at the top of the Well Log tab
- Upload your PDF file (a scanned WCR, state form, or driller's report)
- DrillerDB uses AI to extract the data and populate the form fields
- Review the imported data and make any corrections
- Save the well log
PDF import works best with clearly formatted documents. Handwritten forms may require more manual corrections after import.
Generate As-Built Diagram
Click the Generate As-Built button to create a visual diagram of the well construction based on the data you have entered. This shows the casing, screen, grout, and geology layers in a cross-section view.
When a seal has no depths
A grout row needs a From (ft.) and a To (ft.) before the diagram can draw a band for it. A row that records the material and the sacks but leaves the depths blank is common on older paper logs, and it used to draw nothing at all, so a sealed well could read as unsealed to whoever reviewed the drawing.
The diagram now says so. Under the summary line at the top it prints one line for each such row:
Seal: Bentonite, 8 sacks - sealing interval not recorded
The sack count appears only when the row records one, and a single sack reads "1 sack". Fill the depths in and the note is replaced by a drawn band, labelled the same way:
Bentonite 18-42 ft, 8 sacks
Material names are capitalised for the drawing, so "bentonite" typed in the table appears as "Bentonite". Capitals you typed are left as they are, which keeps "BENTONITE CHIPS" and "GRAVEL PACK" intact.
Downloading State Well Log Forms
For projects in supported states, a Download [State] Well Log button appears in the header. Click it to download a pre-filled state-specific well log form as a PDF.
Supported states include: Alaska, Colorado, Florida, Georgia, Hawaii, Iowa, Idaho, Illinois, Kansas, Mississippi, New Hampshire, New Mexico, Nevada, New York, Oregon, South Carolina, South Dakota, Tennessee, Utah, and Washington.
Alaska companies default to the Water Well Construction Log, not the state form. The button in the header is Download Construction Log, and it downloads the one-page construction log described below instead of the Alaska state well log form. A second button, Download AK State Form, is still there for the state form. You can change which one is the default -- see the next section.
Choosing Your Default Well Log PDF
DrillerDB can produce two different PDFs from the same well log: the state well log form (a pre-filled version of your state's official form, where available) and the Water Well Construction Log (a one-page log with a company block, owner and job header, and a Drillers Material Log table of depth intervals). Both are always available as separate buttons on the Well Log tab. What differs is which one the plain Download Construction Log / Download [State] Well Log button produces when you click it without picking a specific layout.
- Every company defaults to the state well log form, except Alaska companies, which default to the Water Well Construction Log.
- To set your own default, go to Settings > Branding and find the Well Log PDF card. Choose a layout from the Default well log layout dropdown. If you have not chosen one, the card tells you which default you are currently getting.
- Your choice applies to every project. The other layout stays one click away on the Well Log tab either way.
Nearby DNR Wells (Wisconsin)
For projects located in Wisconsin, DrillerDB automatically searches for nearby wells in the DNR (Department of Natural Resources) database. If matches are found, a Nearby DNR Wells table appears below the form showing:
- Well number
- Constructor name
- Date drilled
- Well depth
- Distance from your project
You can download the PDF of any nearby well to reference geology and construction data from neighboring wells.
Saving Your Well Log
The well log auto-saves as you fill in form fields. You can also click the Save button at the bottom of the project to manually save all changes. Once the well log is complete, the tab shows a green checkmark in the tab bar.
Common Questions
Can I edit the well log after saving? Yes. The well log is always editable. Open the project and click the Well Log tab to make changes.
What if my state is not in the download list? You can still fill out the well log form in DrillerDB. The data is stored the same way regardless of state. The download button is just a convenience for states with fillable PDF forms.
Can I import data from Excel instead of PDF? Yes. Use the Import button on the Projects page to import project data from Excel or CSV files, which can include well log fields.
Does the geology data show up anywhere else? The geology formations you enter in the well log feed into the AI geology synthesis feature and appear on the well map for nearby well analysis.
Related Topics
- Projects Overview - Project management basics
- Complete Well Log and Permit - Billing-ready compliance workflow
- Submit Required Compliance Form - Filing state forms
- Maps and Geology - Using nearby geology data