
Billing Entities is part of the Enterprise plan. You also need an Admin or Office role to open and manage it. If you are on a lower plan you will see a message that billing entities require the Enterprise plan.
If your business operates under more than one company name - separate legal entities, branches, or DBAs that each need their own letterhead and books - DrillerDB lets you manage all of them from one account. Every job, work order, and invoice is assigned to one of your billing entities, so each piece of paperwork carries the right company name, logo, and (optionally) its own QuickBooks connection.
A common example: a regional driller running an operating company, a separate ag/irrigation entity, and an equipment-holding company under one roof. Each one becomes a billing entity, and your crews pick the right one when they create work.
Quick Start
- Open Settings > Entities (Billing Entities).
- Click Add entity and enter the company's name and details.
- Save it. The first entity you add becomes the default that new jobs and invoices bill under.
- Repeat for each additional company or branch.
- (Optional) On each entity, click Connect QuickBooks to link that company to its own QuickBooks Online account.
Step-by-Step: Manage Your Billing Entities
Open Settings > Entities
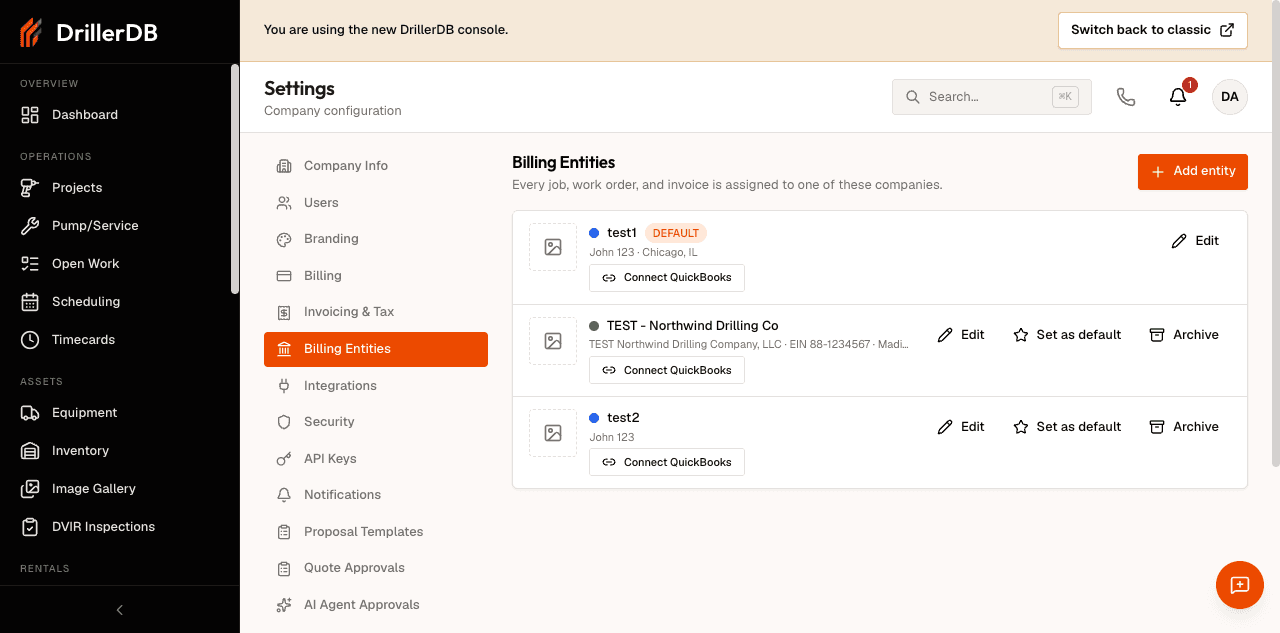
Log in to the console with your existing DrillerDB credentials, open Settings, and choose Entities. The page is titled Billing Entities. It lists each company you bill under as a card, with a colored dot, the company name, and a DEFAULT badge on the one new work bills under.
Add an entity
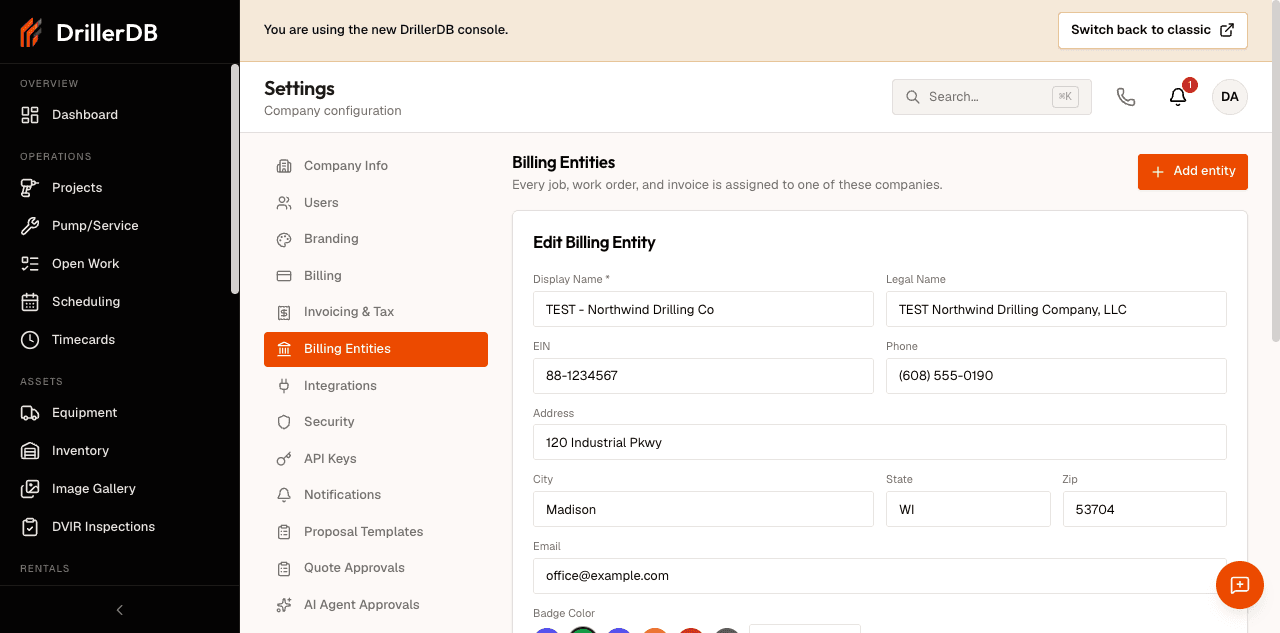
Click Add entity in the top right to open the create form. Fill in:
- Display Name (required) - the company name your crews will recognize and that appears on paperwork.
- Legal Name - the full legal entity name, used where the formal name is needed.
- EIN - the entity's federal tax ID.
- Phone, Address, City, State, Zip, and Email - the entity's contact and location details.
- Badge Color - pick a preset color or enter a hex value. This is the dot that tags the entity throughout the app so crews can tell them apart at a glance.
- Logo - upload the entity's logo (PNG, JPG, or GIF, up to 2MB). It appears on that entity's proposals and invoices.
- Make default - check this to make the new entity the one all new jobs and invoices bill under.
Only Display Name is required - the rest are optional and can be added later by editing the entity.
Save and set the default
Click Add Entity to save it. The first entity you create automatically becomes the default - the company new jobs and invoices bill under unless someone picks a different one. To change the default later, click Set as default on the entity you want.
Only one entity is the default at a time. Setting a new default moves the DEFAULT badge - it does not change the company on jobs and invoices that already exist.
Connect QuickBooks per entity (optional)
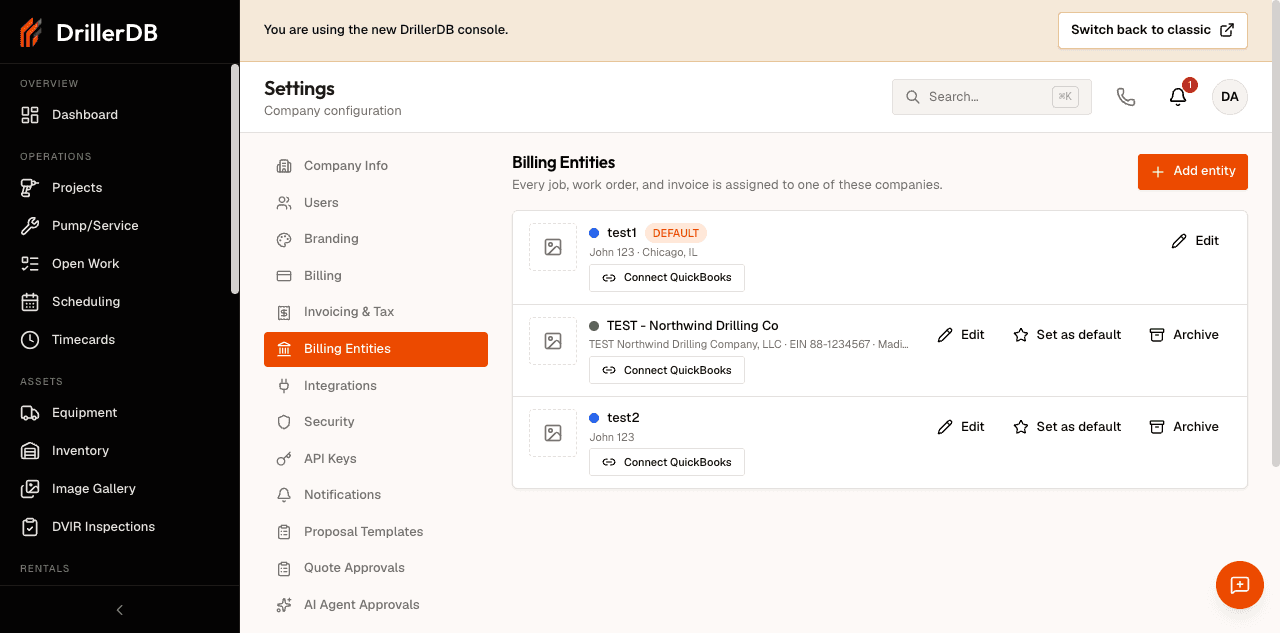
Each billing entity can connect to its own QuickBooks Online company. On the entity's card, click Connect QuickBooks. You are taken to Intuit to sign in and authorize that specific QuickBooks company, then returned to DrillerDB with a confirmation that QuickBooks is connected. Once connected, the card shows the connected QuickBooks company, with a Disconnect action.
This is what lets a multi-entity business keep separate books: each company syncs its invoices and payments to its own QuickBooks file at the same time. (Single-entity accounts connect one QuickBooks company in Settings > Integrations instead.)
Disconnect QuickBooks
To unlink an entity from QuickBooks, click Disconnect on that entity and confirm. New invoices and payments for that entity stop syncing until you reconnect it. Nothing that already synced is removed.
Archive and restore entities
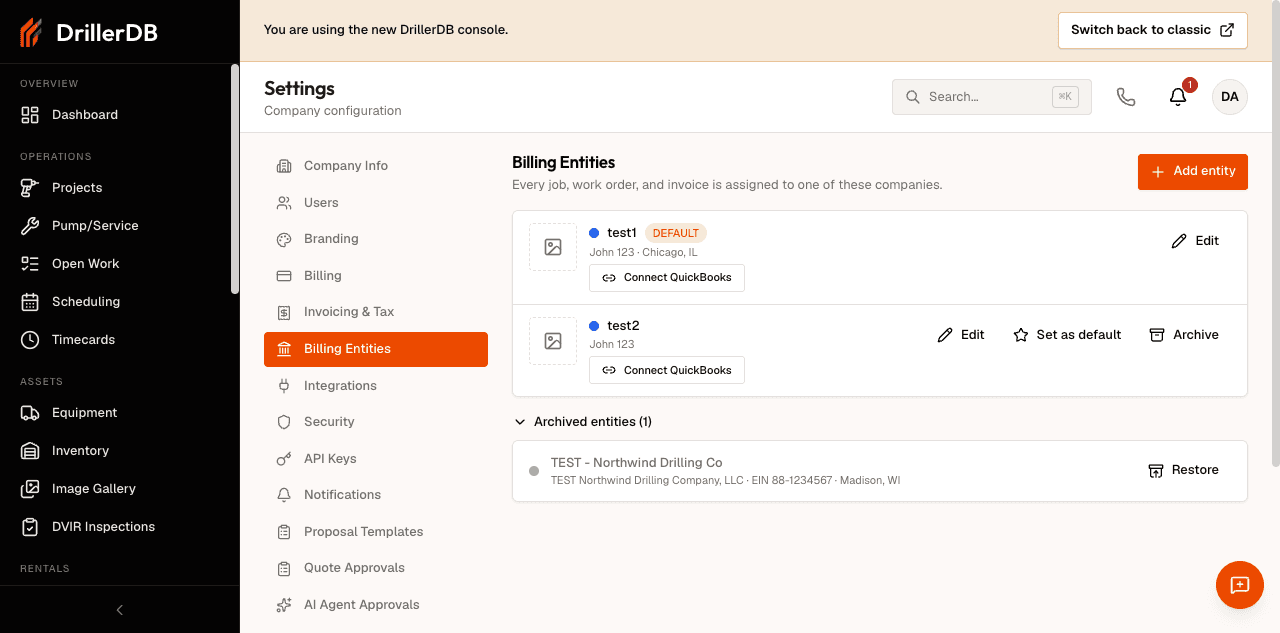
If you stop using an entity, click Archive on its card and confirm. Existing jobs and invoices keep that entity's letterhead - archiving only stops it from being offered on new work.
![Archive entity confirmation dialog reading 'Archive [entity]? Existing jobs and invoices keep its letterhead; it just stops being offered on new work.' with Cancel and Archive entity buttons.](/_next/image?url=%2Fimages%2Fdocs%2Fconsole-help%2Fbilling-entities%2F04_archive_confirm.png&w=3840&q=75)
Archived entities collapse into an Archived entities section at the bottom of the page, where you can Restore any of them later.
Who can manage entities
| Requirement | Detail |
|---|---|
| Plan | Enterprise (the multi-entity / multi-location feature) |
| Role | Admin or Office |
| Where | Settings > Entities |
Users on other plans, or with Field or basic User roles, do not see the Billing Entities page.