
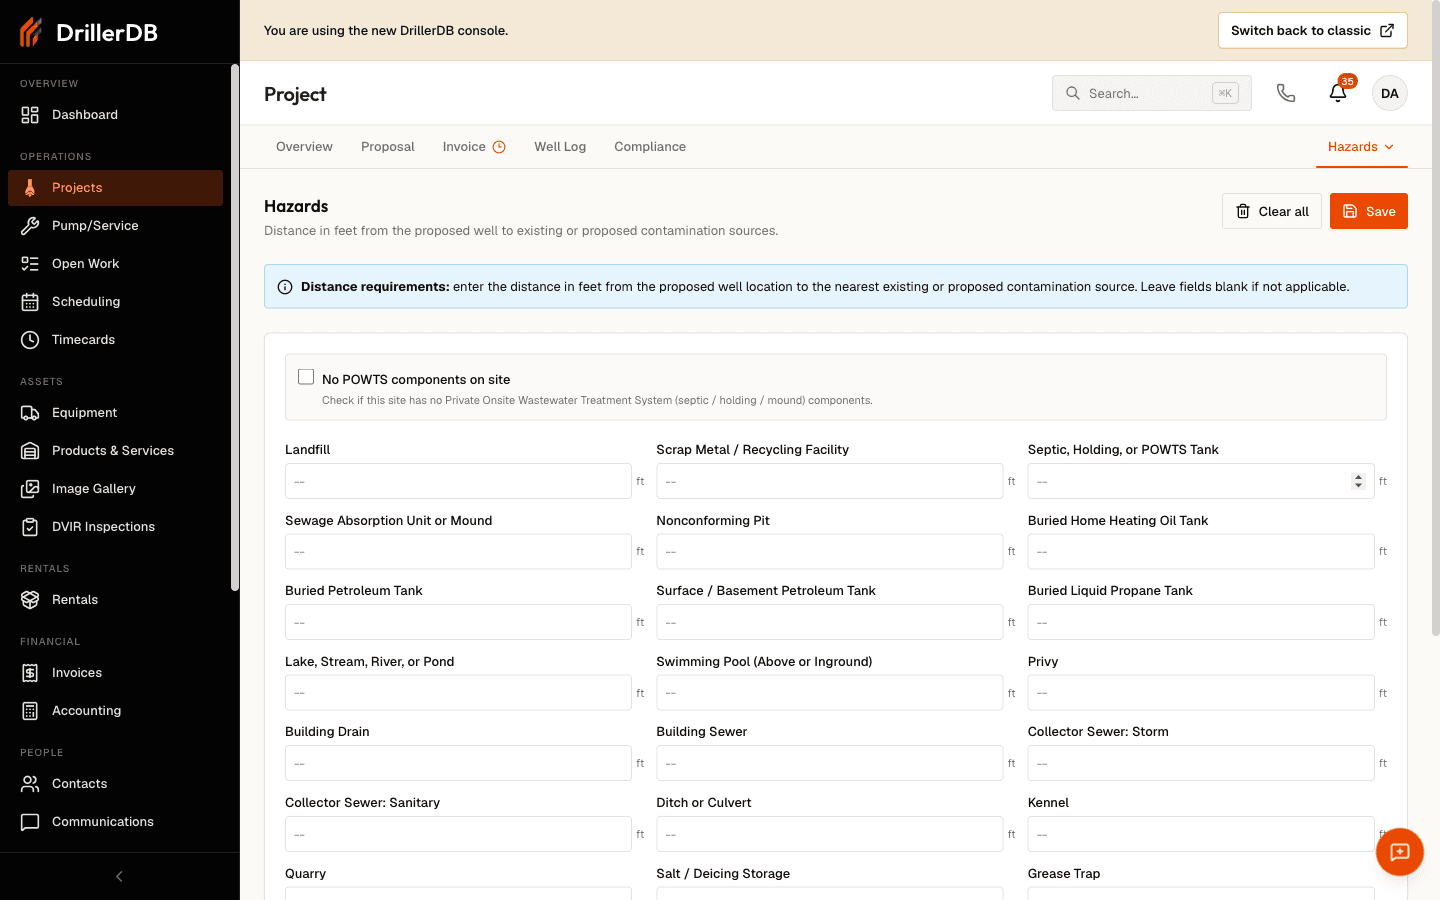
The Hazards tab on a project records the distance, in feet, from the proposed well to nearby contamination sources. These distances document that the well meets required setbacks, which is essential for permits and regulatory compliance.
Quick Start: Record Hazard Distances
- Open the project
- Click the Hazards tab
- Enter the distance in feet to each nearby contamination source
- Leave a field blank if it doesn't apply
- Click Save
How to Get There
The Hazards tab lives on the project detail page.
- Go to Projects in the left menu and open a project.
- Click the Hazards tab.
Automatic Site Hazard Screening
Separately from the distances you measure, DrillerDB checks public agency sources for the site and shows what they hold. The panel is headed Site hazard screening and appears in three places:
- On the project Overview.
- On this Hazards tab, above the distance fields, inside a card headed Mapped hazard screening.
- In the location section when you create a new project.
It reads three groups of sources: geological hazards, groundwater sensitivity, and source-water protection areas.
Screening never fills in the measured distances below, and it never stops you creating a project. It is background information, not a substitute for going to the site and measuring. A result that is missing, empty, or unavailable does not mean the site is clear. The panel says the same thing in its own words: missing data does not establish site safety.
What the panel shows
Once the site has coordinates, the panel lists what came back, most severe first. Findings that carry a severity show one of Very high, High, Moderate, Low, or Very low. Each finding names the agency that published it and links to the source.
Not every source rates severity. Some publish a numbered scale instead, and DrillerDB reports the number rather than inventing a band for it. Wyoming's statewide landslide susceptibility is one: it reads as a susceptibility class from 0 to 10, where 0 is least susceptible. A finding without a severity badge is not a mild finding, it is one whose agency does not publish bands.
An All ... source readings line, which names the number of readings, expands the full list rather than the top few.
While the lookup is running the panel says it is checking current agency sources. If the lookup itself fails, it says it could not check the agency sources and offers Retry sources.
Two results that are not findings
These two look like answers and are not. Read them carefully.
| What you see | What it means |
|---|---|
| Source unavailable | DrillerDB could not reach that agency. Nothing was learned about the site. The panel also counts these and warns that screening is incomplete. |
| No mapped value at this point | The agency answered, and it holds no mapped value at this exact location. That is not the same as the agency saying the site is safe. |
A third line, No source coverage, names groups where no source covers the area at all.
Treat all three as unanswered rather than answered.
Giving the panel a location
The panel needs coordinates. Selecting an address suggestion or picking a point on the map sets the well location and starts the check. If you have typed a complete address instead, use Check site hazards to resolve it.
A typed-address check is an approximate preview. The form says so: it calls the point an approximate address location for screening only, not saved as well GPS, and asks you to confirm the well position on the map.
If you do want that point, Use this location for the project adopts it as the project's coordinates. That button is the only way a typed-address point becomes saved GPS, and you have to press it. Until you do, screening a typed address changes nothing about the project.
A saved project screens against its saved well coordinates, and screening never replaces a surveyed GPS reading on its own.
When you edit the address on a new project, the displayed screening clears, because it belonged to the old location. A well point you selected on purpose is kept, and the form lets you check it again.
Reviewing on the map
The link to the map opens it in a new tab with the three screening layers already turned on. It reads Review mapped hazards on the Hazards tab and Review hazard map on the project Overview and the new-project form.
You can change the layer selection from there as usual. While those layers are on, clicking the map returns the screening result for that point ahead of the other geology overlays, so a click gives you the reading you came for rather than the layer underneath it.
The map and this panel can disagree. The panel asks the agencies live, while the map draws from periodic snapshots, so they differ when an agency publishes between snapshots or a source is down. The panel is the more current of the two.
What You Record
The tab lists the contamination sources a well must be set back from. For each one that's near the site, enter the measured distance in feet. Common sources include:
| Source | Examples |
|---|---|
| Wastewater | Septic, holding, or POWTS tank; sewage absorption unit or mound; privy; building drain or sewer |
| Fuel storage | Buried home heating oil tank; buried or surface petroleum tank; buried liquid propane tank |
| Surface water | Lake, stream, river, or pond; swimming pool; ditch or culvert |
| Waste and animals | Landfill; scrap metal / recycling facility; kennel; animal barn, yard, or shelter; manure stacks |
| Other | Storm or sanitary collector sewer; quarry; salt / deicing storage; grease trap; silo; milk house drain; any other contamination source |
Enter a distance only for the sources that are actually near the site. Leave the rest blank.
Take these measurements before drilling begins. Accurate distances support your permit and protect against future disputes.
The "No POWTS" Checkbox
At the top of the tab, check No POWTS components on site if the site has no Private Onsite Wastewater Treatment System - that is, no septic, holding, or mound components.
Setback Warnings
If you enter a distance below a typical 25 ft minimum setback, DrillerDB flags that field so you can double-check it. Setback minimums vary by state, so verify your state's rules before submitting a permit.
Specific setback requirements vary by state and local jurisdiction. Consult your state's well construction regulations for the exact distances in your service area.
Saving and Clearing
- Click Save to store the distances with the project.
- Click Clear all to reset every distance on the form. Nothing is cleared permanently until you save.
Viewing Saved Data
Saved distances stay with the project. To review or update them, open the project and return to the Hazards tab - your entered values load automatically.
Compliance Documentation
The distances you record here provide documentation that may be needed for:
| Use case | Description |
|---|---|
| Well permits | Demonstrate setback compliance |
| Inspections | Show recorded distances to inspectors |
| Records | Permanent documentation of site conditions |
| Disputes | Evidence of proper well placement |
Troubleshooting
Can't save?
- Make sure every distance is a non-negative number
- Confirm you have edit permission for the project
Need to update a distance?
- Open the project's Hazards tab, change the value, and Save
Related Topics
- Field Reports - All report types
- Daily Logs - Daily activity documentation
- Project Details - Project information and tabs