
Accounts Payable
The Payables tab manages money you owe vendors. Enter bills, route them through approval, pay them from a bank account, keep vendor records, set up recurring bills, apply vendor credits, and track 1099 contractors - all from one place.
Open Accounting > Payables. The header reads "Accounts Payable" with a running subtitle like "12 bills - $4,500.00 outstanding" (that count and total reflect the bills currently loaded on the page, not an all-time figure). A New Bill button sits in the top-right.
The page has seven tabs: Bills, Vendors, Payments, Recurring, Vendor Credits, 1099, and AP Aging.
There is no separate "expenses" screen here - a bill is the way you record a vendor expense, whether or not it will be paid later.
Bills
The Bills tab lists every vendor bill with columns Vendor, Bill #, Due Date, Amount, Balance, and Status. Filter by status (All Statuses, Draft, Submitted, Approved, Paid, Voided) or search by vendor or bill number.
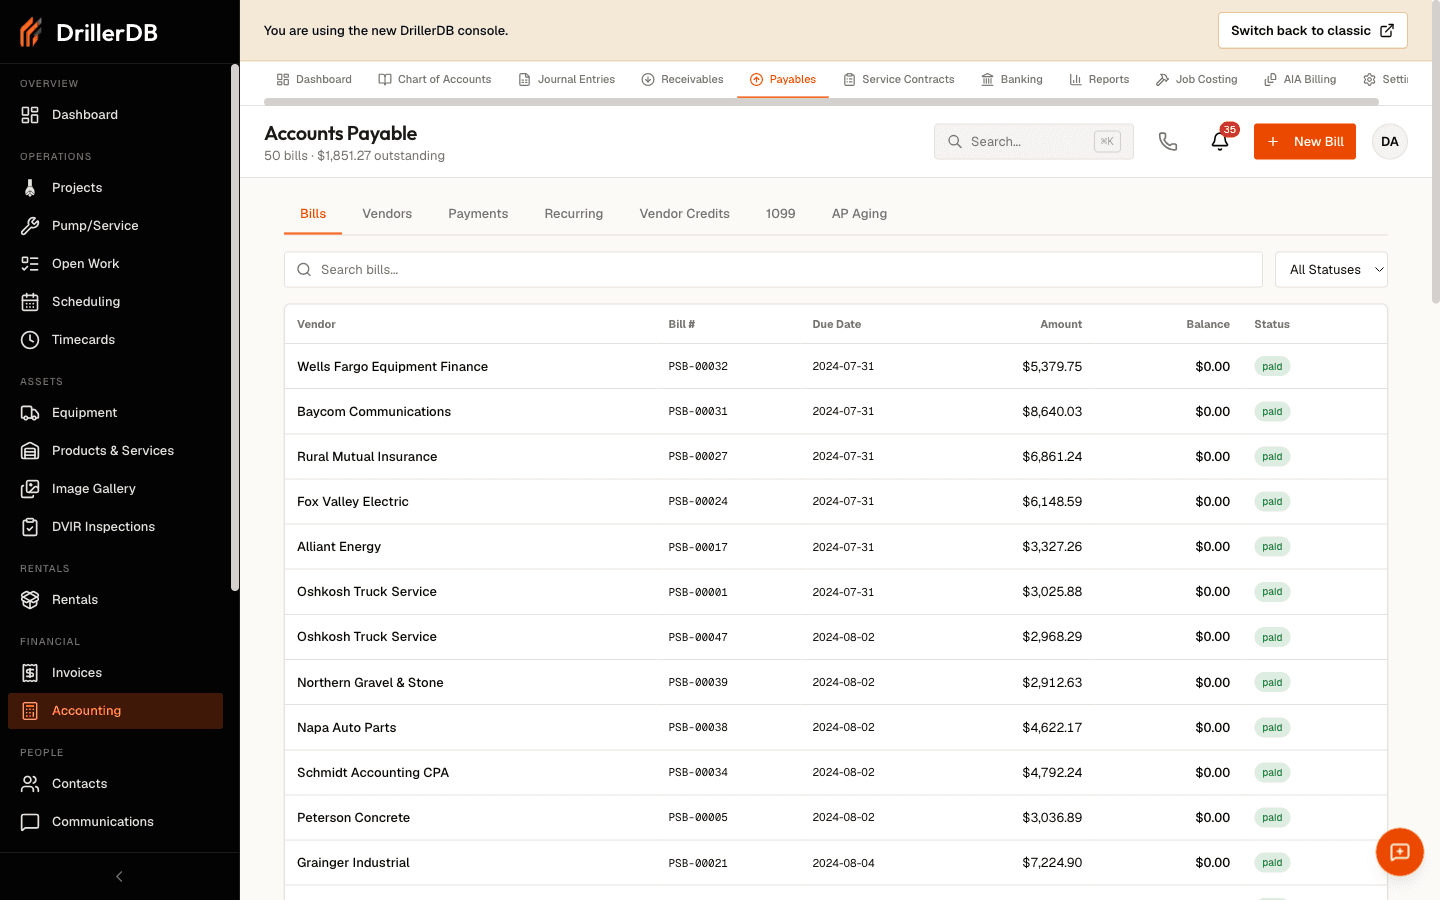
Enter a bill:
- Click New Bill.
- Select a Vendor, optionally enter a Bill Number, then set Amount, Bill Date, and Due Date. Add a Memo if needed.
- Click Save Bill. The bill is created as a Draft.
Move a bill through approval:
Click a bill row to open its detail, then use the status-driven buttons:
- Submit for Approval (Draft to Submitted)
- Approve Bill (Submitted to Approved)
- Schedule Bill (optional, for approved bills)
The detail view also shows the bill's line items (Account, Description, Project, Amount), the linked journal entry, and a full history/audit trail. You can Edit Bill, Apply Credit, or Void Bill from here.
Void marks a bill voided and reverses its journal entries - it cannot be undone. A bill that has already been partially paid cannot be voided.
Vendors
The Vendors tab lists vendors with Name, Email, Phone, Total Paid, a 1099 flag, and Status. Search by name or email, and toggle Show inactive to see deactivated vendors.
Add a vendor:
- Click New Vendor.
- Enter a Display Name (required). Optionally add Business Name, Email, Phone, Business Type, Default Payment Method, Default Payment Terms, and a Default Expense Account.
- For contractors, open the Tax Information section, check 1099 Eligible, and enter the Tax ID (TIN/EIN/SSN).
- Click Create Vendor.
Vendors are never deleted - deactivate them instead, and they move under the "Show inactive" toggle.
Payments
The Payments tab lists recorded payments with Vendor, Date, Amount, Method, Ref #, Bills, and Status.
Pay a bill:
- Click Pay Bills. (Only approved or partially paid bills with a remaining balance are payable.)
- In the Record Bill Payment dialog, choose the Bill and the Bank Account, confirm the Payment Date and Amount, and pick a Payment Method (Check, ACH, Wire, Cash, or Credit Card).
- For a check, enter the Check Number - the console auto-suggests the next number for the selected account. For other methods the field is a Reference Number.
- Add a Memo if needed and click Record Payment.
Recurring
Set up templates that generate the same bill on a schedule. The list shows Template, Vendor, Frequency, Amount, Next Due, and Status.
- Click New Template.
- Select a Vendor, name the template, and pick a Frequency (Weekly, Biweekly, Monthly, Quarterly, or Annually).
- Set the Start Date, Next Generate date, and Days Before Due, and optionally check Auto Post.
- Add one or more line items (Account, Line Description, Amount) with Add Line.
- Click Save Template. Use the preview (eye) icon on a row to see the next bill it will generate.
Vendor Credits
Record a credit from a vendor and apply it against their bills. The list shows Vendor, Date, Credit #, Total, Applied, Remaining, and Status (open, applied, partial, or voided).
- Click New vendor credit, choose the Vendor, set the Credit date and Amount, optionally add a credit number and memo, then click Create credit.
- To use it, open an approved, partial, or submitted bill's detail, click Apply Credit, choose the credit and the amount to apply, and click Apply credit.
Form 1099 tracking
The 1099 tab aggregates vendor payments by tax year for year-end contractor reporting.
- Pick a Tax Year and click Run.
- Summary cards show Eligible Vendors, Above Threshold, Missing TIN, and Missing W-9. The Missing TIN card turns red with an "Action needed" note when any are missing.
- The vendor table lists Vendor, Tax ID (or "Missing"), Total Paid, Threshold, and 1099 Required. A per-vendor detail view breaks down the qualifying payments.
- Click Export CSV or Export PDF to download the filing data.
The full year-end 1099-NEC filing tool (with per-vendor PDFs) lives under Reports.
AP Aging
Age what you owe, the same way A/R ages what you're owed.
- Set the As of date and click Run.
- A cash-forecast row shows Overdue, Due This Week, Due Next Week, and Due Next 90 Days.
- Aging cards break the total into Current, 1-30, 31-60, 61-90, 90+, and Total.
- The table lists each vendor across those buckets; click a vendor to drill into their Open Bills (Bill Date, Due Date, Bill #, Balance, Days Past Due).
Related topics
- Receivables - the accounts-receivable side
- Banking - the bank accounts you pay bills from
- Job Costing - how bills roll into project costs